Your equipment is down. The original manufacturer went out of business fifteen years ago, and there are no drawings. You have the failed part in your hands, but here’s the problem most people don’t anticipate: “You have one part, you don’t know where those dimensions lay in the tolerance range of the original design—your part could even be out of tolerance.”
That observation from an experienced machinist captures the central challenge of reverse engineering legacy castings. The technology to scan a part with sub-millimeter accuracy exists. What doesn’t exist is technology that can tell you whether those dimensions represent the original design intent or years of accumulated wear.
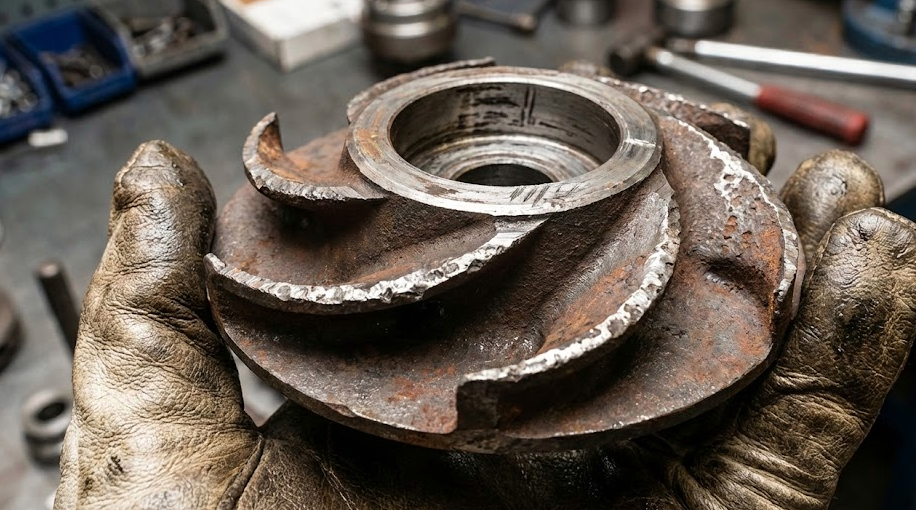
Sample part condition matters more than scanning precision. A worn bearing seat, a corroded surface, an eroded impeller—the scanner captures what IS, not what SHOULD BE. Working with the right foundry partner who can interpret wear patterns and estimate original dimensions determines whether your replacement part performs like new or inherits the problems of the original.
Start with an honest evaluation of what you’re working with. A pristine spare from storage is ideal, but most maintenance managers are dealing with the part that just failed—worn, damaged, or both.
Examine functional surfaces first. Bearing journals, sealing faces, and mating flanges accumulate the most wear. If a shaft journal shows visible wear marks or measures undersized, that dimension cannot be trusted. The foundry will need to estimate the original specification, typically by examining unworn reference surfaces or applying standard engineering practices for that type of component.

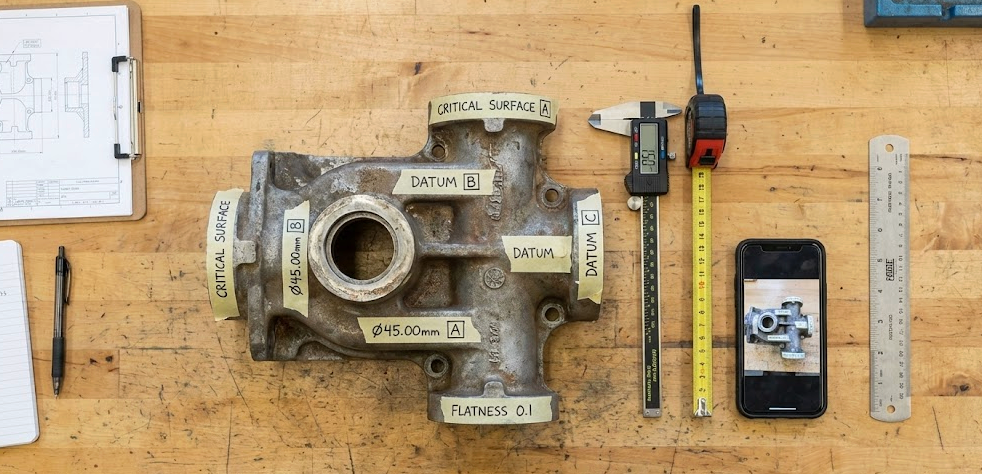
Document everything before shipping. Photograph the part from multiple angles. Note any visible wear patterns, corrosion, cracks, or repairs. Mark critical mating surfaces. If you have the mating components—the housing a bearing sits in, the flange it bolts to—include those measurements. A foundry engineer trying to reverse engineer your part is essentially a detective, analyzing clues within the scan data to reconstruct the designer’s original vision rather than blindly tracing imperfect geometry.
Identify which dimensions are critical to function. Not every surface needs tight tolerance recovery. The bore that accepts a standard bearing matters; the outer profile that just needs to clear an enclosure may not. This assessment saves both cost and potential errors—you want the foundry focusing expertise where it counts.

Geometry is only half the equation. Getting the alloy wrong means the part fails again, potentially catastrophically.
A butterfly valve shaft failure documented in the Engineering Failure Analysis journal illustrates the stakes. The original manufacturer had gone out of business. A second manufacturer produced replacement shafts using reverse engineering—they captured the geometry accurately. What they missed was the material hardness specification. The low hardness made the shaft easily gouged during installation. Oxidized debris accumulated in the shaft-bushing interface, and the shaft seized during operation. The valve was on an aircraft.
Visual identification is unreliable. As one machinist noted, “most steel looks pretty much the same.” A gray iron casting and a ductile iron casting are visually similar but have entirely different mechanical properties.
Positive Material Identification (PMI) testing solves this problem. Using X-ray fluorescence (XRF) spectrometry, PMI can positively identify over 400 alloy grades from a small sample. The test takes minutes and costs far less than a failed replacement part. The limitation: XRF cannot detect light elements like carbon, so for precise carbon steel grades, additional testing like optical emission spectrometry may be required.
If you cannot test the original part, provide as much application context as possible. Operating temperature, corrosive environment, mechanical loads, and the original equipment manufacturer’s typical material choices all help the foundry engineer recommend an appropriate alloy.
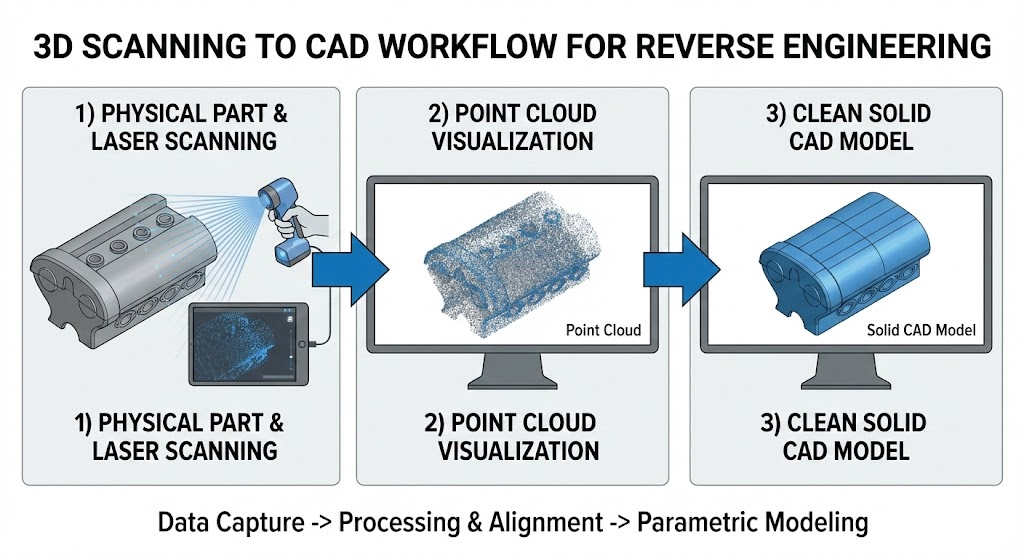
Once a foundry has your sample, they typically begin with 3D scanning to capture the as-is geometry. Laser scanning can achieve accuracies of plus/minus 0.0005 inches—far more precision than sand casting requires, since sand casting tolerances typically fall in the CT9-CT13 range per ISO 8062, roughly plus/minus 1.5 mm for typical dimensions.
The scan produces a point cloud—millions of coordinate points representing the part surface. This gets converted to a mesh model and eventually to a solid CAD model. Here’s where foundry expertise matters most.

For a pristine sample, the CAD model can closely follow the scanned geometry. For worn parts, two approaches exist: exact replication or design intent recovery.
Exact replication captures the part as-is, including wear. This makes sense for purely cosmetic applications or when the wear is within acceptable tolerances. Design intent recovery is what most legacy part replacement actually requires. The engineer analyzes the scan data, identifies wear patterns, and reconstructs what the original designer likely specified. A worn bearing seat might be restored to standard bearing fit dimensions. An eroded impeller might be rebuilt to match the profile of unworn sections.
A Japanese reverse engineering center puts it directly: “Even if there are worn areas, by restoring the CAD data while understanding the original design intent, it becomes possible to remanufacture parts.”
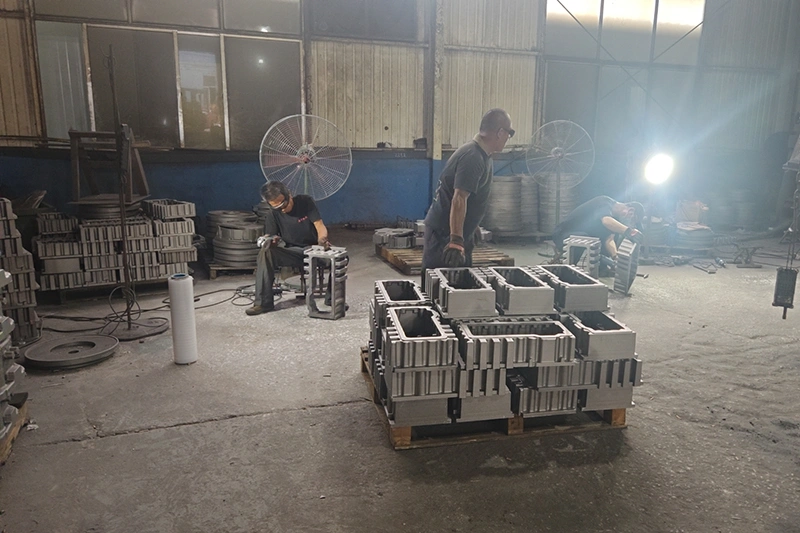
The CAD model then goes through pattern making, where shrinkage allowances (around 2.8% for stainless steel, 5/32 inch per foot for aluminum) and machining allowances (typically 2-5 mm for sand casting) get added before the pattern is produced.
You need budget guidance before contacting foundries. Based on industry data:
Reverse engineering service costs:
This includes scanning ($1,000-$3,500) and CAD modeling ($1,000-$3,500), with variation based on part complexity and required precision.
Timeline ranges:
Sample condition directly affects both cost and timeline. A worn part requiring design intent recovery takes more engineering hours than scanning a pristine sample. A corroded surface that produces poor scan data may require manual measurement backup. Damaged or incomplete parts may need additional research to reconstruct missing sections.
Reverse engineering can extend equipment life 10 to 30 years when done properly. Success depends less on finding the most advanced scanning technology and more on partnering with a foundry that understands the difference between capturing worn geometry and recovering design intent.
Before contacting foundries:
Questions to ask potential foundry suppliers:
The foundry that asks detailed questions about your sample’s condition—not just its dimensions—is usually the one that understands what reverse engineering actually requires.

