Green sand foundries have a dirty secret: the average rejection rate sits around 5%. That’s 50,000 defective parts per million—fifty times higher than typical manufacturing standards.
I’ve watched new foundry workers struggle with mold preparation for years. They mix the sand wrong. They pack it too loose or too tight. They yank the pattern out and watch the cavity walls crumble. Each failed mold means wasted time, wasted materials, and another casting headed for the scrap pile.
Here’s the thing: sand molding isn’t complicated once you understand the fundamentals. The process hasn’t changed much in centuries because it works. You’re creating a negative space in compacted sand, pouring molten metal into that space, and breaking away the sand to reveal your part.
This guide breaks the process into nine clear steps. Follow them correctly, and you’ll produce consistent molds that yield quality aluminum castings. Skip steps or rush through them, and you’ll join the 5% club.
You need three categories of supplies: the sand mixture itself, the tooling to shape it, and safety gear to protect yourself from silica dust.
Green sand is the workhorse of aluminum casting. It’s called “green” not because of its color—it’s usually black or gray—but because it’s damp, like green wood.
The mixture consists of four components in specific ratios:
| Component | Industrial Ratio | Training/Educational Ratio |
|---|---|---|
| Silica sand | 75-85% | 90% (9 parts) |
| Bentonite clay | 5-10% | 10% (1 part) |
| Water | 2-5% | To achieve proper consistency |
| Additives (sea coal, etc.) | Up to 5% | Optional |
The target moisture content is 3-3.3%. Too dry and the sand won’t hold its shape. Too wet and steam forms when you pour molten aluminum—that steam creates blowholes and porosity throughout your casting.
For training purposes, the simple ratio works well: 9 parts fine silica sand to 1 part powdered bentonite clay, with water added gradually until the mixture holds together.
Gather these items before you start:
Properly prepared sand is the foundation of every good mold. Rush this step, and nothing else matters.
The goal is sand that holds its shape firmly but breaks cleanly—like perfect sandcastle material.
Start with the correct ratio. For a training batch, measure 9 parts silica sand by volume and 1 part bentonite clay. Industrial foundries typically use 100 parts sand to 8 parts clay by weight.
Dump the sand onto a clean, flat surface. Sprinkle the clay powder evenly across the top.
Add water slowly—about 3% of total weight to start. For a small batch, that might be a cup of water for every 10 pounds of dry mixture.
Don’t dump it all at once. Sprinkle water while mixing to distribute moisture evenly.
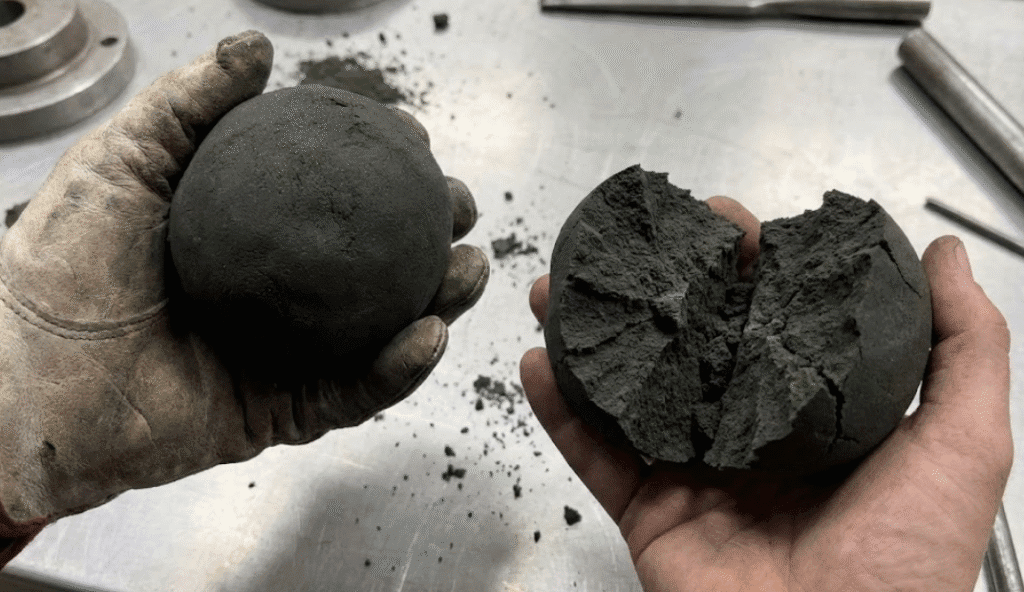
Grab a handful of sand and squeeze it into a ball. If it holds its shape without crumbling, you’re close.
Now break the ball in half. A properly tempered sand breaks cleanly with sharp edges. If it crumbles into powder, add more water. If it smears or sticks to your hand, it’s too wet—add more dry sand.

Industrial foundries use mulling machines that squeeze and smear the mixture for several minutes. This coats each sand grain with a thin layer of clay.
Without a muller, mix by hand for at least 10-15 minutes. Use a squeezing, smearing motion—not just stirring. The clay needs mechanical work to activate its binding properties.
Professional foundries test four properties before using any batch:
The drag forms the bottom portion of your mold cavity. It’s also where your pattern sits during initial setup.
Place the drag on a flat molding board with the open side facing up. The board should be smooth and larger than your flask.
Apply a light coating of parting compound to the inside edges of the drag. This isn’t strictly necessary, but it helps sand release cleanly later.
Position your pattern face-down in the center of the drag. “Face-down” means the side that will become the parting line—typically the flat or widest surface—touches the molding board.
Make sure the pattern doesn’t touch the flask walls. Leave at least 1-2 inches of clearance on all sides.
This is where most beginners fail. They either don’t pack firmly enough, creating weak spots that collapse, or they pack too hard and can’t remove the pattern cleanly.
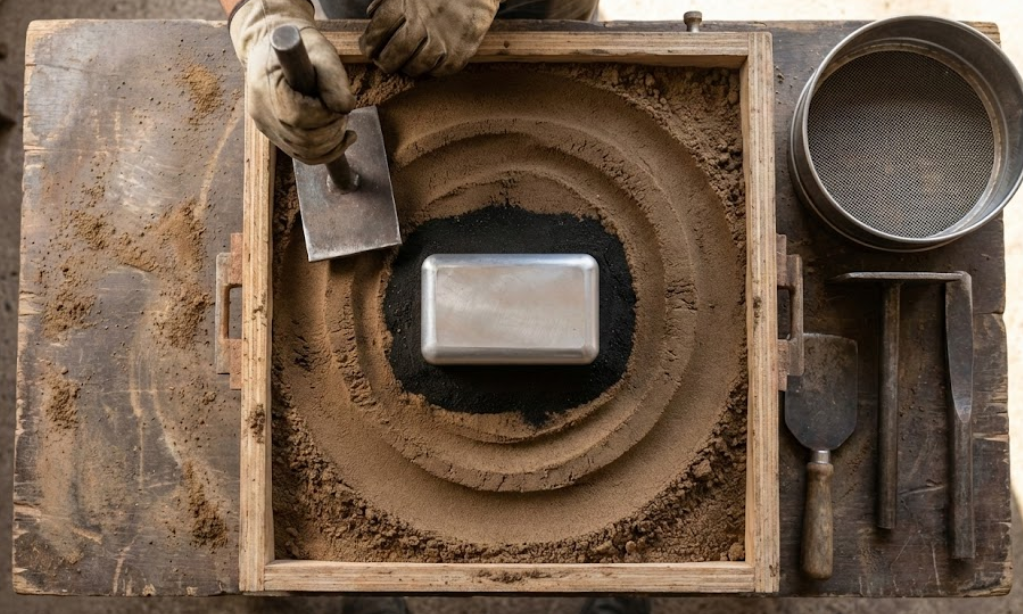
First: Riddle fine sand over the pattern. Hold your sieve about 6 inches above the pattern and shake a thin layer (about 1/4 inch) of fine sand directly onto it. This “facing sand” captures fine details.
Second: Add bulk sand in 2-3 inch layers. Don’t dump all the sand at once. Build it up gradually.
Third: Ram each layer firmly. Work from the edges toward the center in a systematic pattern. Apply even pressure—about 100 PSI equivalent through your ramming tool.
Research shows that squeeze pressure above 140 PSI provides almost no additional benefit and can cause “spring-back” where the sand actually expands after you release pressure.
Fourth: Strike off the excess. Use a straight edge to scrape the sand level with the top of the flask. The bottom of your drag should be flat.

The cope completes your mold cavity and contains the sprue and riser channels.
Flip the entire drag assembly over. Your pattern is now facing up, embedded in sand.
This is critical: dust the exposed sand surface generously with parting powder. Cover every square inch. This barrier prevents the cope sand from bonding to the drag sand.
Place the cope on top of the drag. Align the flask pins—most flasks have locating pins that ensure the halves mate correctly every time.
The sprue is your metal entry point. The riser compensates for shrinkage as the casting solidifies.
Place the sprue pin about 1-2 inches from the pattern. Use a tapered wooden dowel—wider at the top, narrower at the bottom. The taper creates a funnel shape that controls metal flow and reduces turbulence.
Position the riser pin on the opposite side of the pattern, near the thickest section of your part. The riser should be slightly larger in diameter than the thickest part of your casting.
Why does riser placement matter? Aluminum shrinks about 6% by volume as it solidifies. The riser acts as a reservoir—liquid metal feeds back into the casting to fill shrinkage voids. Position it wrong, and you’ll get internal cavities.
Use the same layering and ramming technique you used for the drag:
Pay special attention to the area around your pins. Sand should be uniformly dense—soft spots create weak channels that erode during pouring.
With both halves packed, you’re ready to create the actual mold cavity by removing your pattern and cutting the gating channels.
Remove the sprue and riser pins first. Twist them gently while pulling straight up. The tapered shape should release easily. If they stick, you packed too tight or didn’t use enough parting compound.
Lift the cope straight up. Don’t tilt it—lifting at an angle can drag sand and damage the cavity edges. If your flask has handles, use them. If not, grip opposite corners and lift evenly.
Set the cope aside on a flat surface with the cavity facing up. Inspect both halves for any obvious damage: crumbled edges, cracks, or sand that fell into the cavity.
This step separates good molders from frustrated ones. A clean pattern pull leaves sharp cavity edges. A rough pull destroys hours of work.
Tap the pattern lightly with a mallet or your palm. This breaks the bond between pattern and sand and creates microscopic space around the edges.
Lift straight up, following the draft angle. If your pattern has proper draft (1-3 degrees of taper), it should release smoothly. If it sticks, tap more—don’t force it.
Repair minor damage immediately. Small chips or rough spots can be smoothed with a spoon tool or your finger. Major damage means starting over.
Here’s a tip from experienced molders: if your pattern consistently sticks, the problem is usually inadequate draft, rough surface finish, or insufficient parting compound. Fix the root cause rather than fighting each pull.

The gating system directs molten metal from the sprue into your mold cavity. A good design fills the cavity smoothly without turbulence. A bad design erodes sand and creates defects.
Carve the runner channel from the base of the sprue hole to the edge of the cavity. The runner is horizontal, typically cut into the drag half. Make it roughly rectangular, about 1/2 inch wide and 1/4 inch deep for small castings.
Create in-gates where the runner meets the cavity. These are the actual entry points for metal. Position them at the lowest point of the cavity to promote bottom-up filling.
Poke vent holes using a thin wire or needle. Push through from the cavity surface up through the cope sand to the top. These tiny channels let trapped air and gases escape as metal fills the mold.
Smooth all cut surfaces with a small brush or your finger. Loose sand particles become inclusions in your casting.
You’re almost ready to cast.
Apply mold wash if desired. This is a thin coating of refractory material (graphite or silica flour mixed with water) painted onto the cavity surface. It improves surface finish and reduces metal penetration into the sand. For training purposes, it’s optional.
Lower the cope back onto the drag. Align the flask pins carefully. The two halves should mate with no visible gap at the parting line.
Clamp or weight the mold. Molten aluminum exerts pressure as it fills the cavity. Without clamping, the cope can lift and metal runs out at the parting line. Use C-clamps, weights, or a flask clamp mechanism.
Your mold is ready for metal.
Sand mold making follows a logical sequence: prepare your sand, pack the drag around your pattern, add the cope with sprue and riser, separate the halves, remove the pattern, cut your gating system, and reassemble for pouring.
The three factors that matter most are sand preparation, consistent ramming pressure, and clean pattern removal. Get those right, and the rest follows.

