TL;DR: Properly mixing casting investments requires precision in both measurement and technique to avoid costly failures. The process involves calculating exact quantities, adding powder to water (never reverse), allowing proper saturation time, and thorough mixing using hand, mechanical, or vacuum methods. Following the correct pouring technique and allowing adequate undisturbed setting time (4-6 hours) are crucial final steps that ensure detailed, defect-free castings.
Step 1: Calculating Investment Quantity
One common method involves calculating the cubic inch content of the flask and then converting this to the weight of investment needed :
For a round flask: Volume (cubic inches) = 0.7854×(diameter in inches)2×(height in inches)
For a square or rectangular flask: Volume (cubic inches) = (width in inches)×(length in inches)×(height in inches)
Once the flask volume in cubic inches is determined, this value can be divided by a factor to obtain the required weight of investment powder in pounds.
Step 2: Adding Powder to Water
Always add the pre-weighed investment powder to the pre-measured water—never the reverse.
Pour the powder gradually in a sprinkled pattern across the water’s surface to ensure even distribution.
The water temperature should be consistent with manufacturer recommendations, typically between 70-75°F (21-24°C) for most casting investments.
Step 3: Slaking (Saturation)
After adding all the measured investment powder to the water, you’ll typically notice an island of dry material forming on the surface. This is normal and requires a brief waiting period.
Allow the mixture to sit undisturbed for approximately 30 seconds to a minute, or until the island of powder appears fully saturated.
Step 4: Hand Mixing
Use a clean spatula to gently but thoroughly combine the powder and water. Employ smooth, deliberate strokes, ensuring to scrape the sides and bottom of the mixing bowl frequently to incorporate all material and prevent any unmixed powder from being left behind.
For dental gypsum, back-and-forth strokes while occasionally turning the bowl are recommended. The goal is to achieve a homogenous, creamy, lump-free slurry.
The recommended hand mixing time can vary depending on the specific investment and the quantity being mixed. Common guidelines suggest:
- 3 to 3.5 minutes.
- 3 to 5 minutes.
- For dental gypsum, hand mixing until a creamy, homogenous mix is achieved typically takes around 60 seconds.
Step 4.1: Mechanical Mixing (without vacuum)
Electric mixers, such as dedicated laboratory mixers or even drills with appropriate mixing paddles, can provide a more consistent and vigorous mixing action than hand mixing, potentially reducing mixing time.
When using a mechanical mixer for materials like dental gypsum, first add the powder to water and briefly stir by hand until all powder is wet. Then proceed with mechanical mixing for 10 to 30 seconds at the manufacturer’s recommended speed.
After mechanical mixing, a quick hand mix helps check for homogeneity and ensures all material from the bowl sides is incorporated. For other investment types, a mechanical mixing time of 1-2 minutes might be appropriate.
Be cautious not to over-mix the investment. Mechanical mixers impart significant energy and can incorporate unwanted air if not used correctly or if operated at excessive speeds.
Step 4.2: Vacuum Mixing (of the slurry)
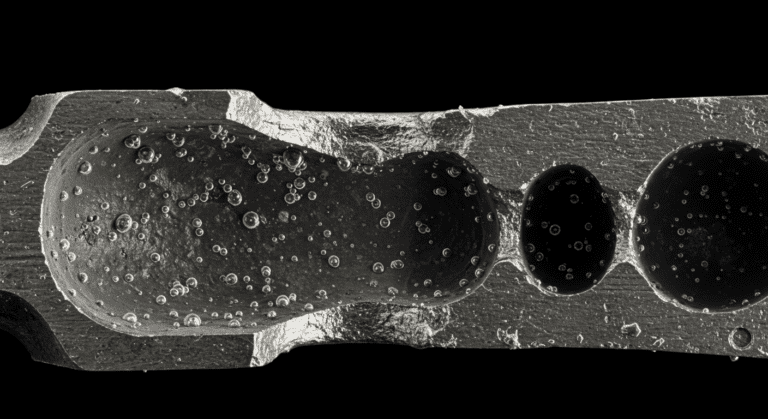
Vacuum mixing represents a highly effective method for removing entrapped air and dissolved gases from the investment slurry. This technique leads to denser, stronger molds and significantly reduces porosity-related casting defects.
This approach is particularly recommended for phosphate-bonded investments, which are frequently used for high-precision dental castings. The process begins by combining investment powder and liquid in the vacuum mixer bowl.
The bowl is then sealed, and a vacuum is drawn using a vacuum pump. While under vacuum, a mechanical mixing paddle within the bowl homogenizes the slurry thoroughly.
A common guideline for vacuuming the mixed slurry is approximately 20 seconds after the vacuum chamber has reached its target vacuum level. This is typically indicated by a “bell” sound or specific gauge reading on your equipment.
Step 5: Pouring the Mixed Investment into the Flask
Once the investment slurry has been thoroughly mixed and, ideally, de-aired, it must be carefully poured into the flask containing the wax pattern(s).
Slightly tilt the flask to allow the investment to flow smoothly down one side. Pour the mixture in a continuous, controlled stream down the flask side rather than directly onto the wax pattern tree. This approach allows the investment to rise slowly from the bottom of the flask, gradually engulfing the wax pattern(s) without trapping air.
Gentle vibration of the flask during pouring can help the investment flow into fine details and encourage any remaining air bubbles to rise to the surface. However, excessive vibration can be detrimental, potentially causing particle segregation or dislodging patterns.
If using a vibrating table, carefully control the intensity. Short bursts of low-amplitude vibration typically yield better results than continuous high-intensity vibration.
Step 5: Final Vacuuming of the Flask
After pouring, place the filled flask into a vacuum chamber to remove any remaining air bubbles. Draw a vacuum on the chamber and maintain it for the specified period.
- For general jewelry applications, this vacuuming period can be up to 90 seconds.
- For dental applications, a second vacuum degassing of the filled flask for 2-3 minutes is sometimes recommended, often accompanied by gentle vibration of the flask to facilitate the rise and escape of bubbles.
Step 6: Left Undisturbed
The final step involves allowing the filled flask to remain completely undisturbed for a specific period. During this time, the investment sets and hardens completely.
A common general recommendation is to leave the flask undisturbed for at least two hours. However, for optimal results, especially with patterns featuring fine details or engravings, a longer curing time of 4 to 6 hours is strongly recommended.


