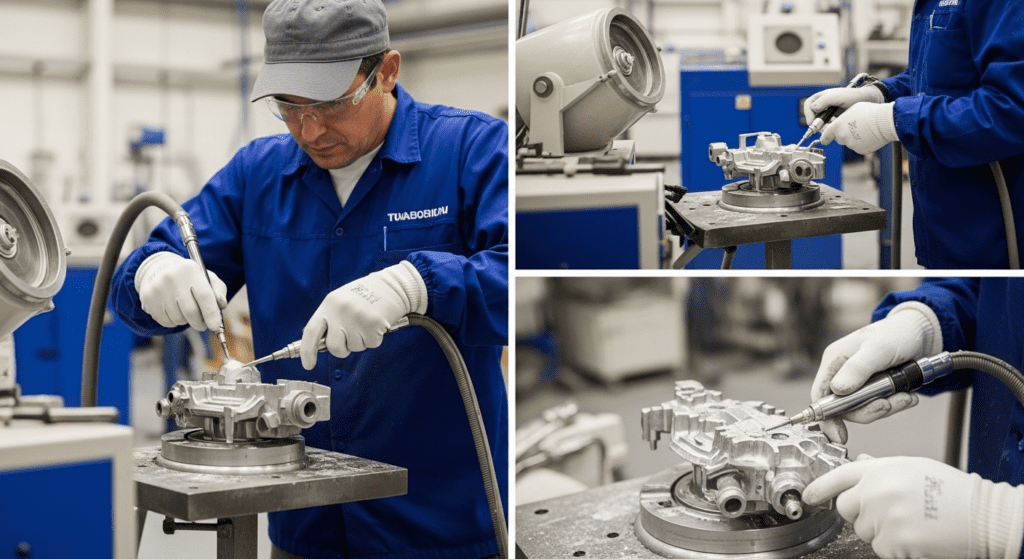
Investment casting requires thorough cleaning at every stage to produce high-quality parts. The cleaning process removes contaminants, excess material, and surface defects that can compromise the final product. Most importantly, proper cleaning ensures dimensional accuracy and surface finish meet specifications.
The three critical cleaning phases are wax pattern cleaning, ceramic shell removal, and final casting finishing. Each phase uses specific techniques to address different contamination types.

Before creating the ceramic shell, the wax pattern must be completely clean. Any contamination on the wax will transfer to the ceramic shell and ultimately affect the metal casting.
Compressed air removes loose particles and dust from pattern surfaces. This simple first step prevents embedding contaminants into the wax during subsequent cleaning operations.
Operators use filtered, dry air at 40-60 PSI to blast away debris. The process takes only seconds but significantly improves pattern cleanliness.
Chemical cleaning removes oils, release agents, and fingerprints from wax patterns. Pattern wash baths contain specialized detergents that clean without damaging the wax surface.
The cleaning solution typically operates at 70-90°F to prevent pattern distortion. Patterns soak for 30-60 seconds with gentle agitation.
Clean rinse water removes all chemical residues from the pattern surface. Multiple rinse stages ensure complete detergent removal.
Use filtered compressed air to blow off excess water, then let patterns air dry in a dust-free environment for at least 30 minutes before shell building.
After metal pouring and solidification, the ceramic shell must be removed completely. This phase uses mechanical and chemical methods to break away the shell without damaging the casting.
Operators use hammers and chisels to break away large shell sections. This method works best for simple geometries with thick, accessible shells.
Vibratory equipment uses controlled vibration to fracture and remove ceramic shells. The casting tumbles with ceramic media that breaks away shell material.
This automated process handles multiple parts simultaneously. Cycle times range from 30 minutes to several hours depending on shell thickness.
Water jets operating at 5,000-20,000 PSI blast away ceramic shell remnants. The high-pressure stream reaches internal passages and complex geometries.
Water jet cleaning excels at removing shell from thin-walled sections. The process leaves no abrasive residue on casting surfaces.
Abrasive blasting propels sand, steel shot, or ceramic beads at the casting surface. This aggressive method removes stubborn shell material and surface oxidation.
Blast pressure and media type depend on casting material and required finish. Aluminum oxide and steel grit are common blast media choices.
Caustic solutions dissolve ceramic shell material without affecting the metal casting. This method reaches areas inaccessible to mechanical cleaning.
Typical leaching solutions include sodium hydroxide or potassium hydroxide at elevated temperatures. Immersion times vary from hours to days based on shell composition.
The final cleaning phase transforms rough castings into finished parts. These steps remove gates, smooth surfaces, and prepare castings for use or additional processing.
Cutting tools remove sprues, gates, and risers from the casting body. Band saws, cut-off wheels, and plasma cutters handle different material types.
Use abrasive cutoff wheels or band saws for most materials. For harder alloys, consider plasma or laser cutting. Leave 1/8 to 1/4 inch of material for subsequent grinding.
Grinding wheels smooth cut surfaces and remove sharp edges. Deburring eliminates potentially dangerous burrs that could cause handling injuries.
Start with coarse grinding wheels (36-60 grit) to remove gate stubs. Progress to finer grits (80-120) for blending. Use die grinders with carbide burrs for tight corners and complex geometries.
Shot bead blasting creates uniform surface textures on cleaned castings. Different media produce various finish types from matte to semi-bright.
Glass beads provide gentle cleaning for softer alloys. Steel shot creates compressive surface stresses that improve fatigue resistance.
Vibratory tumbling uses ceramic or plastic media to polish casting surfaces. Parts tumble with media, water, and cleaning compounds for hours or days.
This mass finishing process handles large production volumes efficiently. Media selection determines final surface roughness values.
Progressive grinding and polishing achieve mirror-like finishes when required. The process uses increasingly fine abrasives to remove surface imperfections.
Automated polishing equipment ensures consistent results across production runs. Manual polishing handles complex geometries requiring special attention.
Acid pickling removes surface oxides and scale from metal castings. The chemical process creates clean, active surfaces for subsequent coating operations.
Common pickling acids include hydrochloric, sulfuric, and nitric acids. Immersion times and temperatures depend on alloy composition and oxide thickness.
Proper rinsing neutralizes acid residues after pickling. This prevents ongoing corrosion and prepares surfaces for final inspection.
