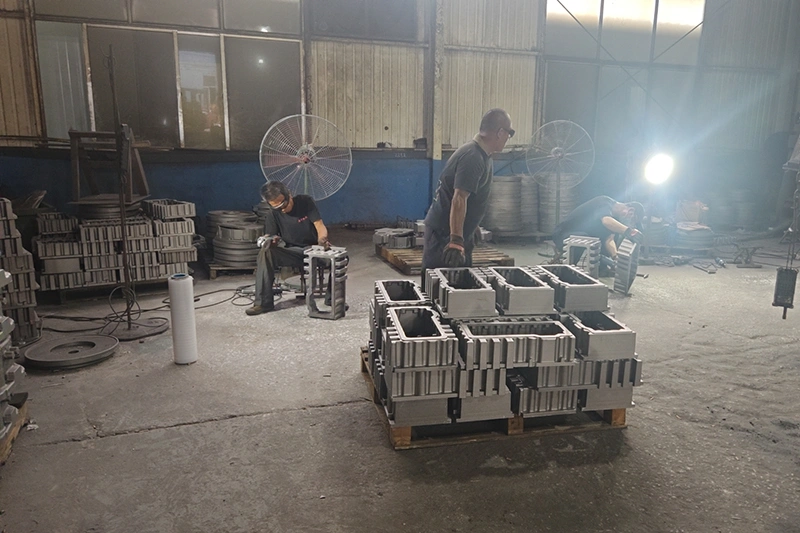
“Casting shrinkage calculations are a black art best left to old pattern makers that have many years of experience making mistakes.” That quote from a veteran pattern maker captures what many practitioners feel when tackling shrinkage allowance. But here’s what those years of mistakes taught me: the complexity isn’t in choosing the right material factor from a table. It’s in accounting for section thickness variation across your casting.
Most shrinkage guides focus on material selection – use 2% for steel, 1% for gray iron, 1.5% for aluminum. That’s necessary but insufficient. In my experience, section thickness variation causes more dimensional problems than picking the wrong material factor. A casting with walls ranging from 5 mm to 40 mm won’t shrink uniformly, regardless of what the tables say.
Pattern shrinkage allowance addresses only the final stage of metal contraction – solid-state shrinkage that occurs after the casting has fully solidified. This typically accounts for 1-2% linear shrinkage, and it’s the pattern maker’s job to compensate.
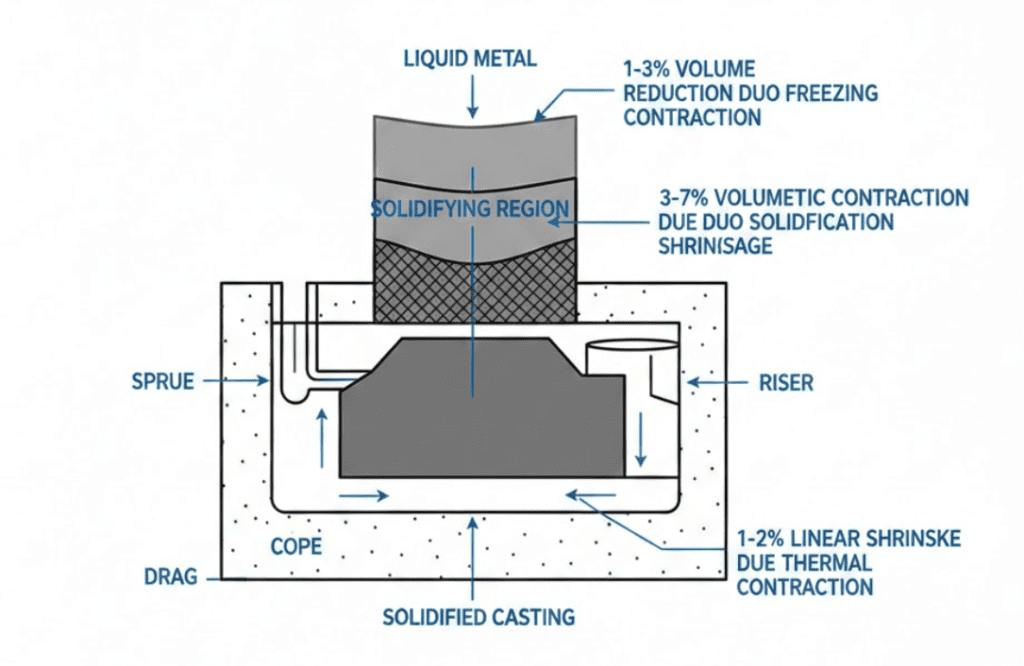
Three distinct shrinkage stages occur during casting:
Liquid shrinkage (1-3% by volume) happens while the metal remains molten and cools toward solidification temperature. The pouring basin and sprue compensate for this – not your pattern.
Solidification shrinkage (3-7% volumetric) occurs during the phase change from liquid to solid. This is the largest contraction, and risers handle it by feeding molten metal into the casting as it solidifies.
Solid shrinkage (1-2% linear) continues as the solidified casting cools to room temperature. This is what your pattern dimensions must compensate.
Risers handle the big shrinkage. Your pattern handles the last 1-2%, but getting that wrong means scrapped castings or machining that can’t reach cast surfaces.
Before applying any correction factors, you need baseline shrinkage values. These tables represent typical ranges – your foundry may run higher or lower depending on their process.
| Material | mm/m | % | Notes |
|---|---|---|---|
| Gray cast iron | 7-10.5 | 0.7-1.0 | Graphite expansion reduces shrinkage |
| White cast iron | 17-21 | 1.7-2.1 | No graphite compensation |
| Ductile iron | 0-10 | 0-1.0 | Highly variable by foundry |
| Carbon steel | 20-25 | 2.0-2.5 | Use higher end for thick sections |
| Stainless steel | 17-28 | 1.7-2.8 | Varies by grade |
Gray iron versus ductile iron behave differently because of their graphite structure. Gray iron contains graphite flakes that expand during the eutectic transformation, partially offsetting thermal contraction. That’s why gray iron shrinkage can be as low as 0.7% – the graphite expansion is doing some of the compensation for you.
| Material | mm/m | % | Notes |
|---|---|---|---|
| Aluminum alloys | 13-18 | 1.3-1.8 | Silicon content affects shrinkage |
| Brass | 14 | 1.4 | Relatively consistent |
| Bronze | 10.5-21 | 1.05-2.1 | Wide range by alloy |
| Copper | 16 | 1.6 | Moderate shrinkage |
These values come from multiple industry sources including P.N. Rao’s Manufacturing Technology. But I’ve learned to treat them as starting points. As one casting veteran put it: “No two similar castings will shrink the same at different foundries.” Your foundry’s specific pouring temperature, mold material, and cooling conditions all shift the actual shrinkage from these baseline values.
Here’s where most shrinkage guides fall short. They give you a material factor and call it done. But what happens when your casting has a 10 mm web connecting to a 50 mm boss?
A steel casting I consulted on illustrates the problem. The pattern maker applied standard 1.5% shrinkage uniformly across all dimensions. On inspection, some dimensions hit the expected shrinkage, while others contracted significantly more. The root cause: wall thickness varied from thin ribs to heavy bosses, and each section behaved differently.
The physics explain why. A 50 mm steel section cools at approximately 5 degrees C per minute, while a 10 mm section in the same casting cools at 20 degrees C per minute – a 4:1 differential. The thicker sections are still solidifying when thin sections have already contracted. Those solid-but-still-hot thin sections lack their room-temperature material properties. When the thick sections finally solidify and shrink, they distort the thin sections that froze earlier.
One practitioner described wear liners with 0.5 to 2 inch thickness variation that exhibited 0.25 inch curling despite “correct” pattern dimensions. That’s not a material factor problem – that’s differential shrinkage from thickness variation.
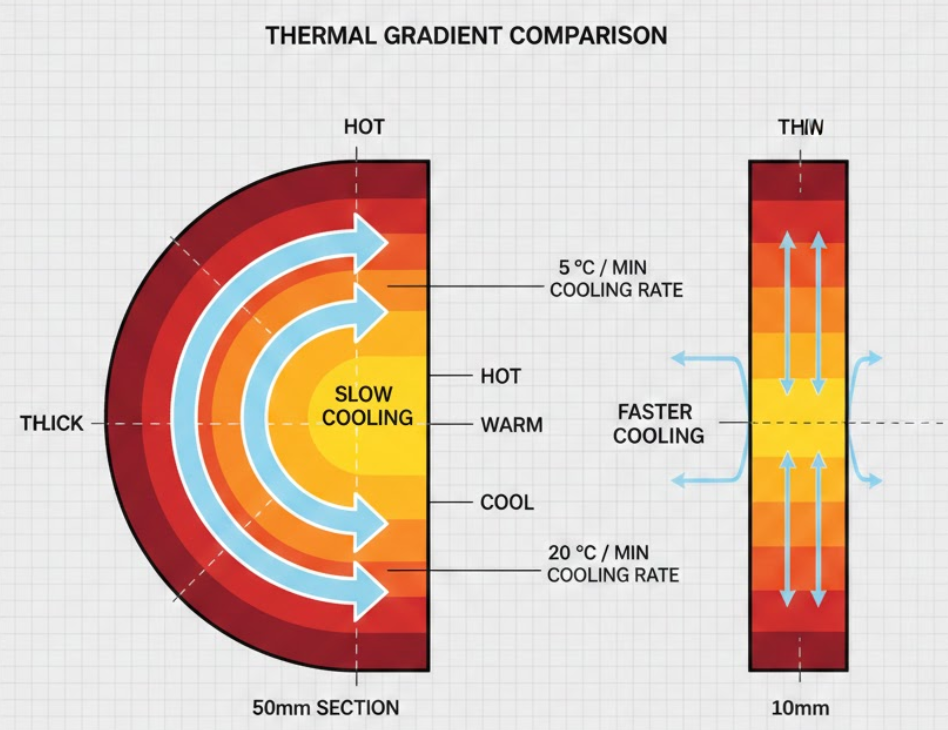
Apply these multipliers to your base material shrinkage rate:
| Section Thickness | Correction Factor | Example (2% base) |
|---|---|---|
| Thin webs (< 5 mm) | 0.8x | 1.6% |
| Standard sections (5-30 mm) | 1.0x | 2.0% |
| Thick sections (> 30 mm) | 1.2x | 2.4% |
For a carbon steel casting with 2% baseline shrinkage, a 40 mm boss should use 2.4% (2% x 1.2), while a 4 mm web in the same casting should use 1.6% (2% x 0.8).
A word of caution: keep wall thickness ratios below 3:1 where possible. Beyond that, shrinkage defects become increasingly likely. Ratios exceeding 6:1 cause severe strength reduction in the transition zones.
With your material baseline and section corrections determined, calculation is straightforward.
Basic formula:
Pattern Dimension = Final Dimension x (1 + Adjusted Shrinkage Rate)Worked example – steel bracket with varying sections:
Final dimension: 150 mm boss diameter (wall thickness 35 mm)
Final dimension: 80 mm web length (wall thickness 8 mm)
Alternative calculation using mm/m:
Allowance = Dimension (mm) x Rate (mm/m) / 1000
Pattern = Dimension + Allowance
For the same 150 mm dimension with 24 mm/m adjusted rate:
Allowance = 150 x 24 / 1000 = 3.6 mm
Pattern = 150 + 3.6 = 153.6 mm
Always round up. Nothing is worse than a casting that’s 0.010 or 0.020 inch short of being able to machine the cast surface off. An oversized casting can be machined; an undersized one is scrap.
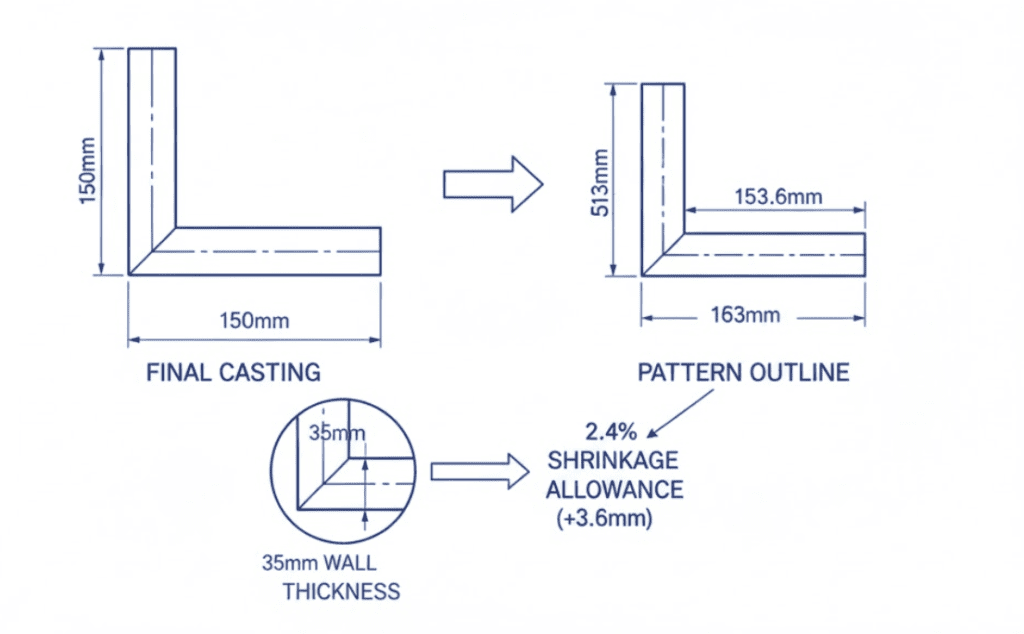
Calculation gives you a starting point. Verification tells you if it works.
First article inspection is where theory meets reality. One aluminum casting operation consistently applied their standard 7% shrinkage allowance – until they started measuring actual parts. The castings arrived dimensionally incorrect, and only systematic measurement revealed that their process actually ran different from the assumed value.
Verification protocol:
Modern 3D scanning with 0.025 mm accuracy makes comprehensive dimensional verification practical. Inspection that once took hours now takes minutes, and you capture every surface rather than spot-checking a few dimensions.
Communicate with your foundry. In pattern making, the best shrinkage factor isn’t the one from a textbook – it’s the one calibrated to your specific foundry’s process. They pour that material every day; they know how it behaves in their molds.
Section thickness drives most shrinkage-related dimensional problems. The material tables that fill most shrinkage guides are necessary starting points, but they assume uniform wall thickness. Real castings don’t work that way.
Apply the correction factors: 0.8x for thin sections under 5 mm, 1.2x for thick sections over 30 mm. A casting with both needs different allowances in different areas, and the transition zones need particular attention.
The veteran had it right when he said no two similar castings shrink the same at different foundries. Treat published values as starting points, verify with first article inspection, and build your own database from measured results. The draft angle and machining allowance get more attention, but shrinkage allowance done right is what keeps your dimensions where they need to be.

